INTRODUCTION
What is the Bullhorn REST API?
The Bullhorn REST API gives partner a simple yet powerful way to interact with the Bullhorn system. Because it uses HTTP requests, responses, and standard data structures, the REST API is accessible from many programming languages and is particularly well-suited to mobile applications and applications that use the most current web technologies.
Before using the REST API, you must perform authorization and authentication. See Getting Started with the Bullhorn REST API for information about obtaining an OAuth 2.0 access token and logging in to the REST API. for information about obtaining an OAuth 2.0 access token and logging in to the REST API.
What is Postman?
The idea for Postman arose while the founders were working together and were frustrated with the existing tools for testing APIs. They felt that there should be a better language for developers to use to communicate with APIs. This led to the creation of Postman. Postman helps you build, test, and document APIs faster.
Get it here!
Get Started with Postman
Download the Bullhorn REST API Configuration
We have created a bundle that includes all of the commonly used API calls with the REST API. This is the first step in getting started with the Bullhorn REST API.
Download it here!
Import Configuration into Postman
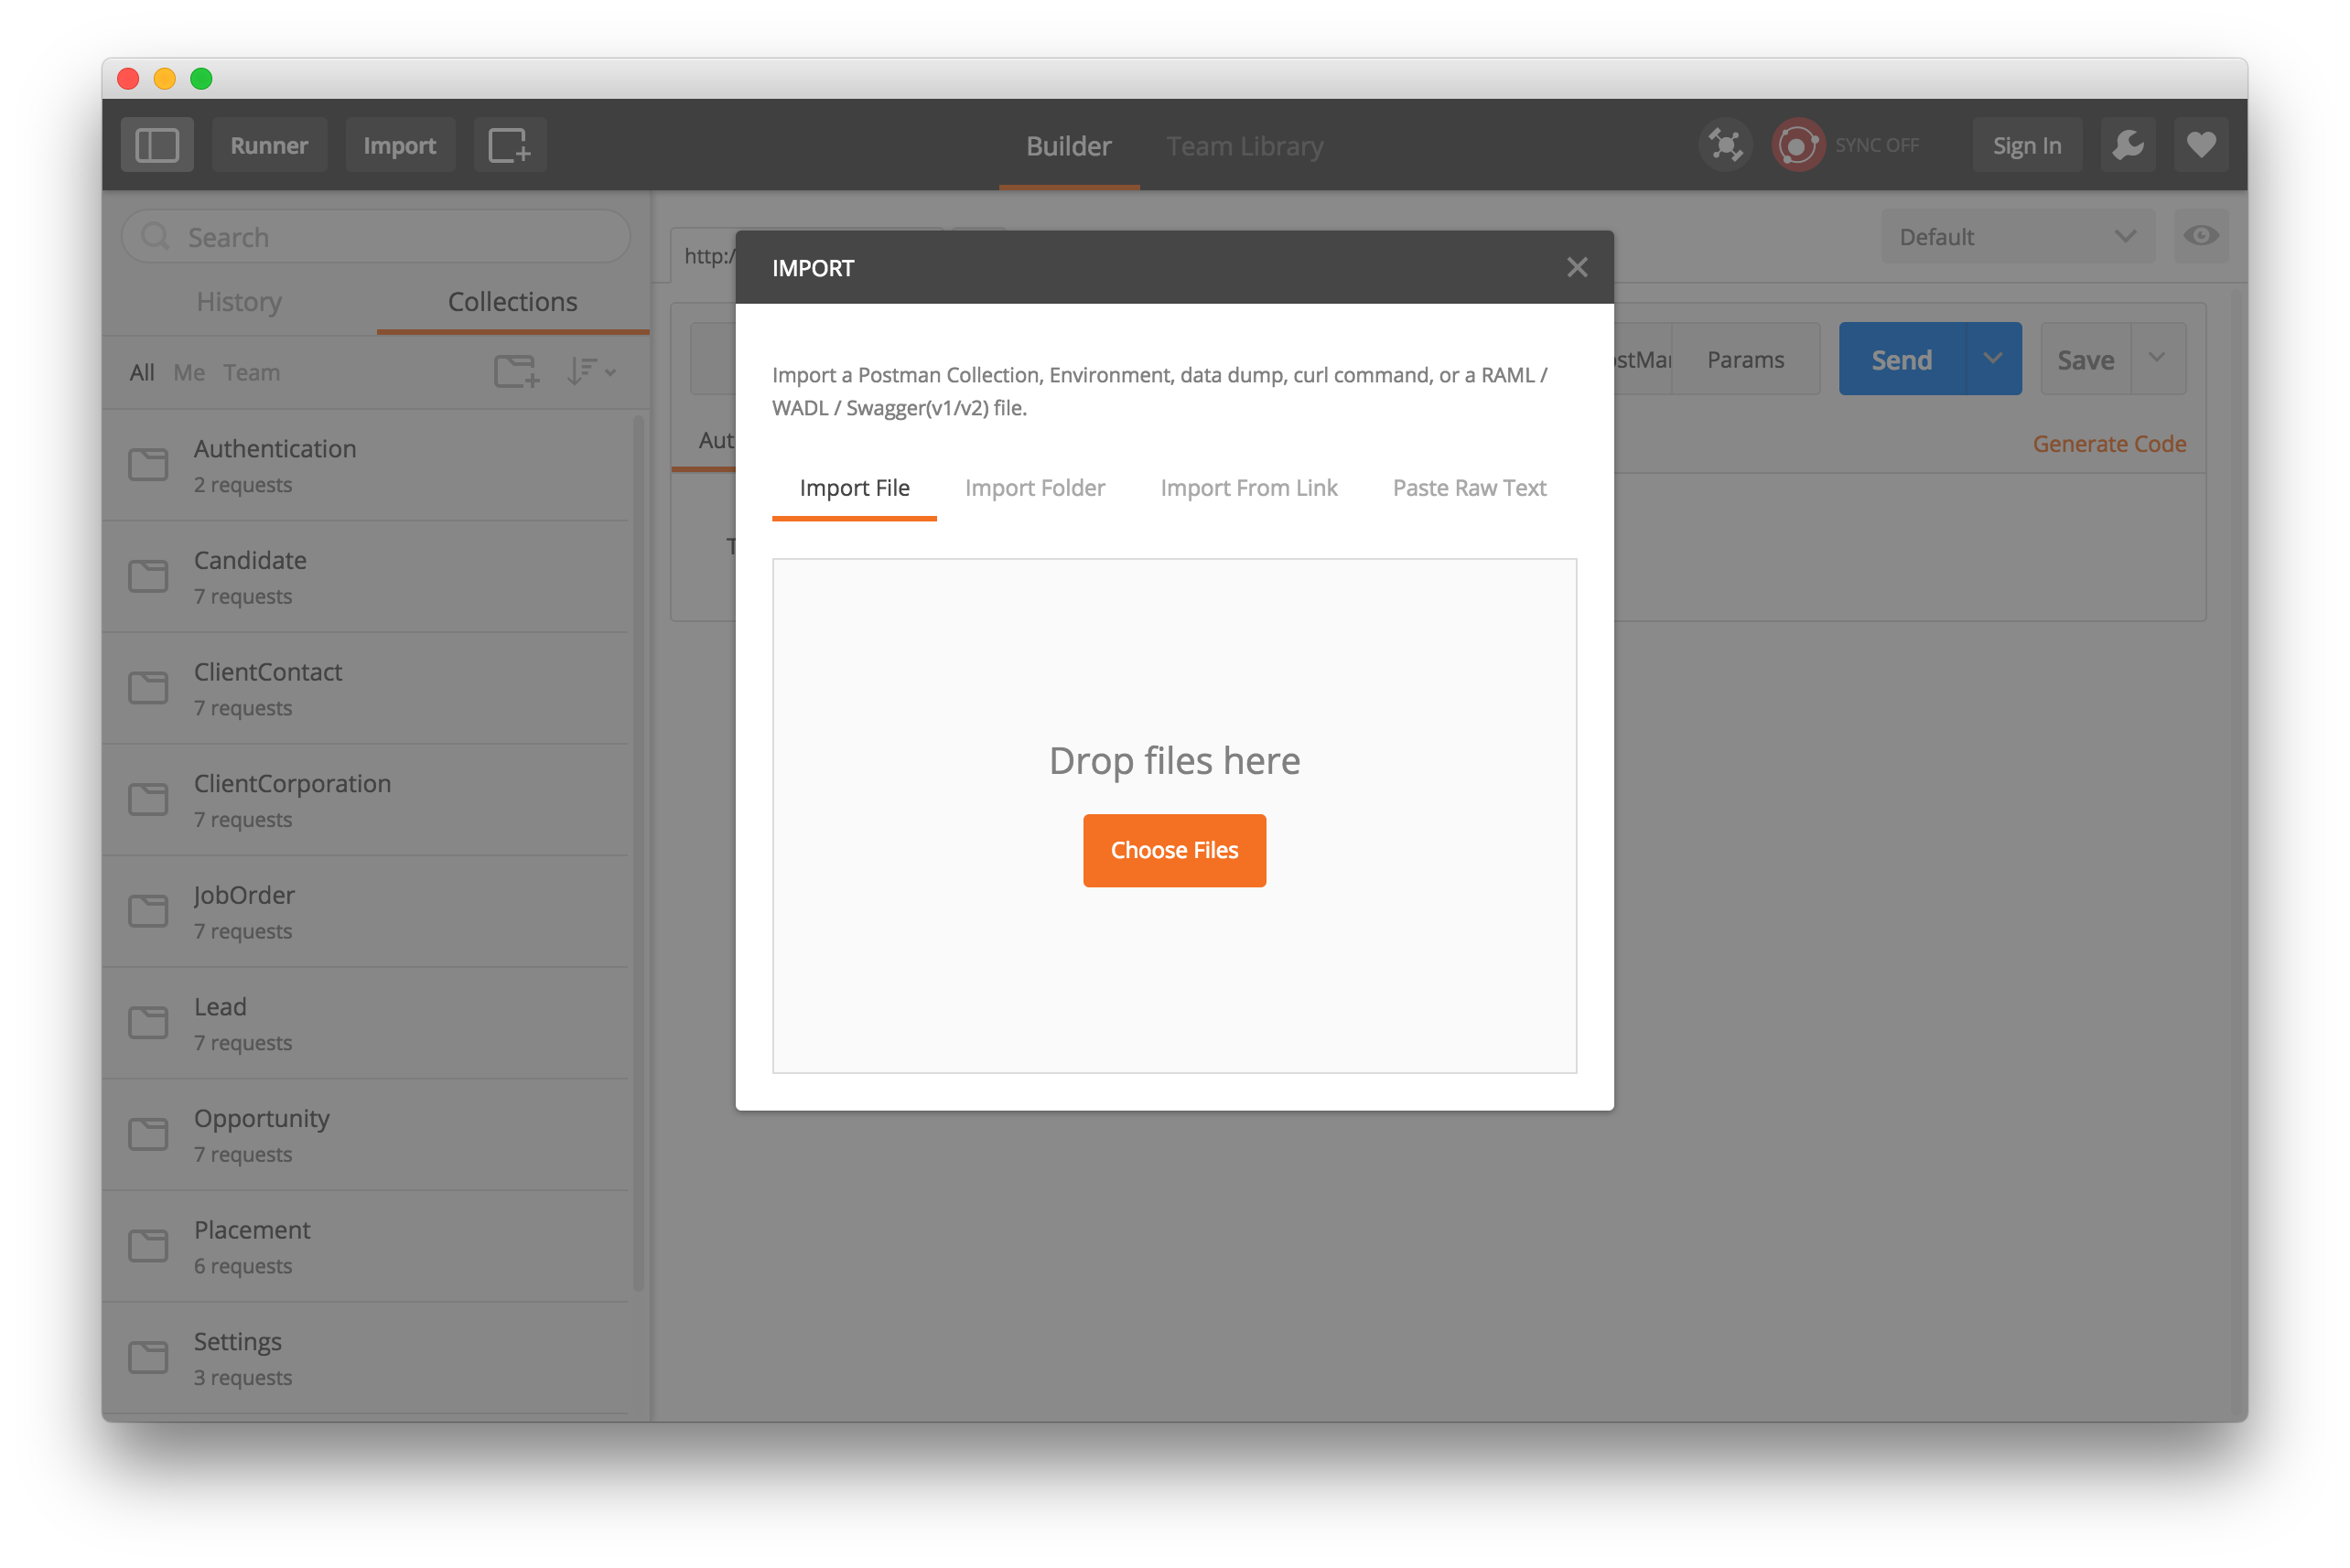
Once you have the configuration file downloaded, you can import it into Postman by clicking on the “Import” button located in the header of the application. This will open the import menu and you should be able to load the file you downloaded in the previous step.

Setup your Environment
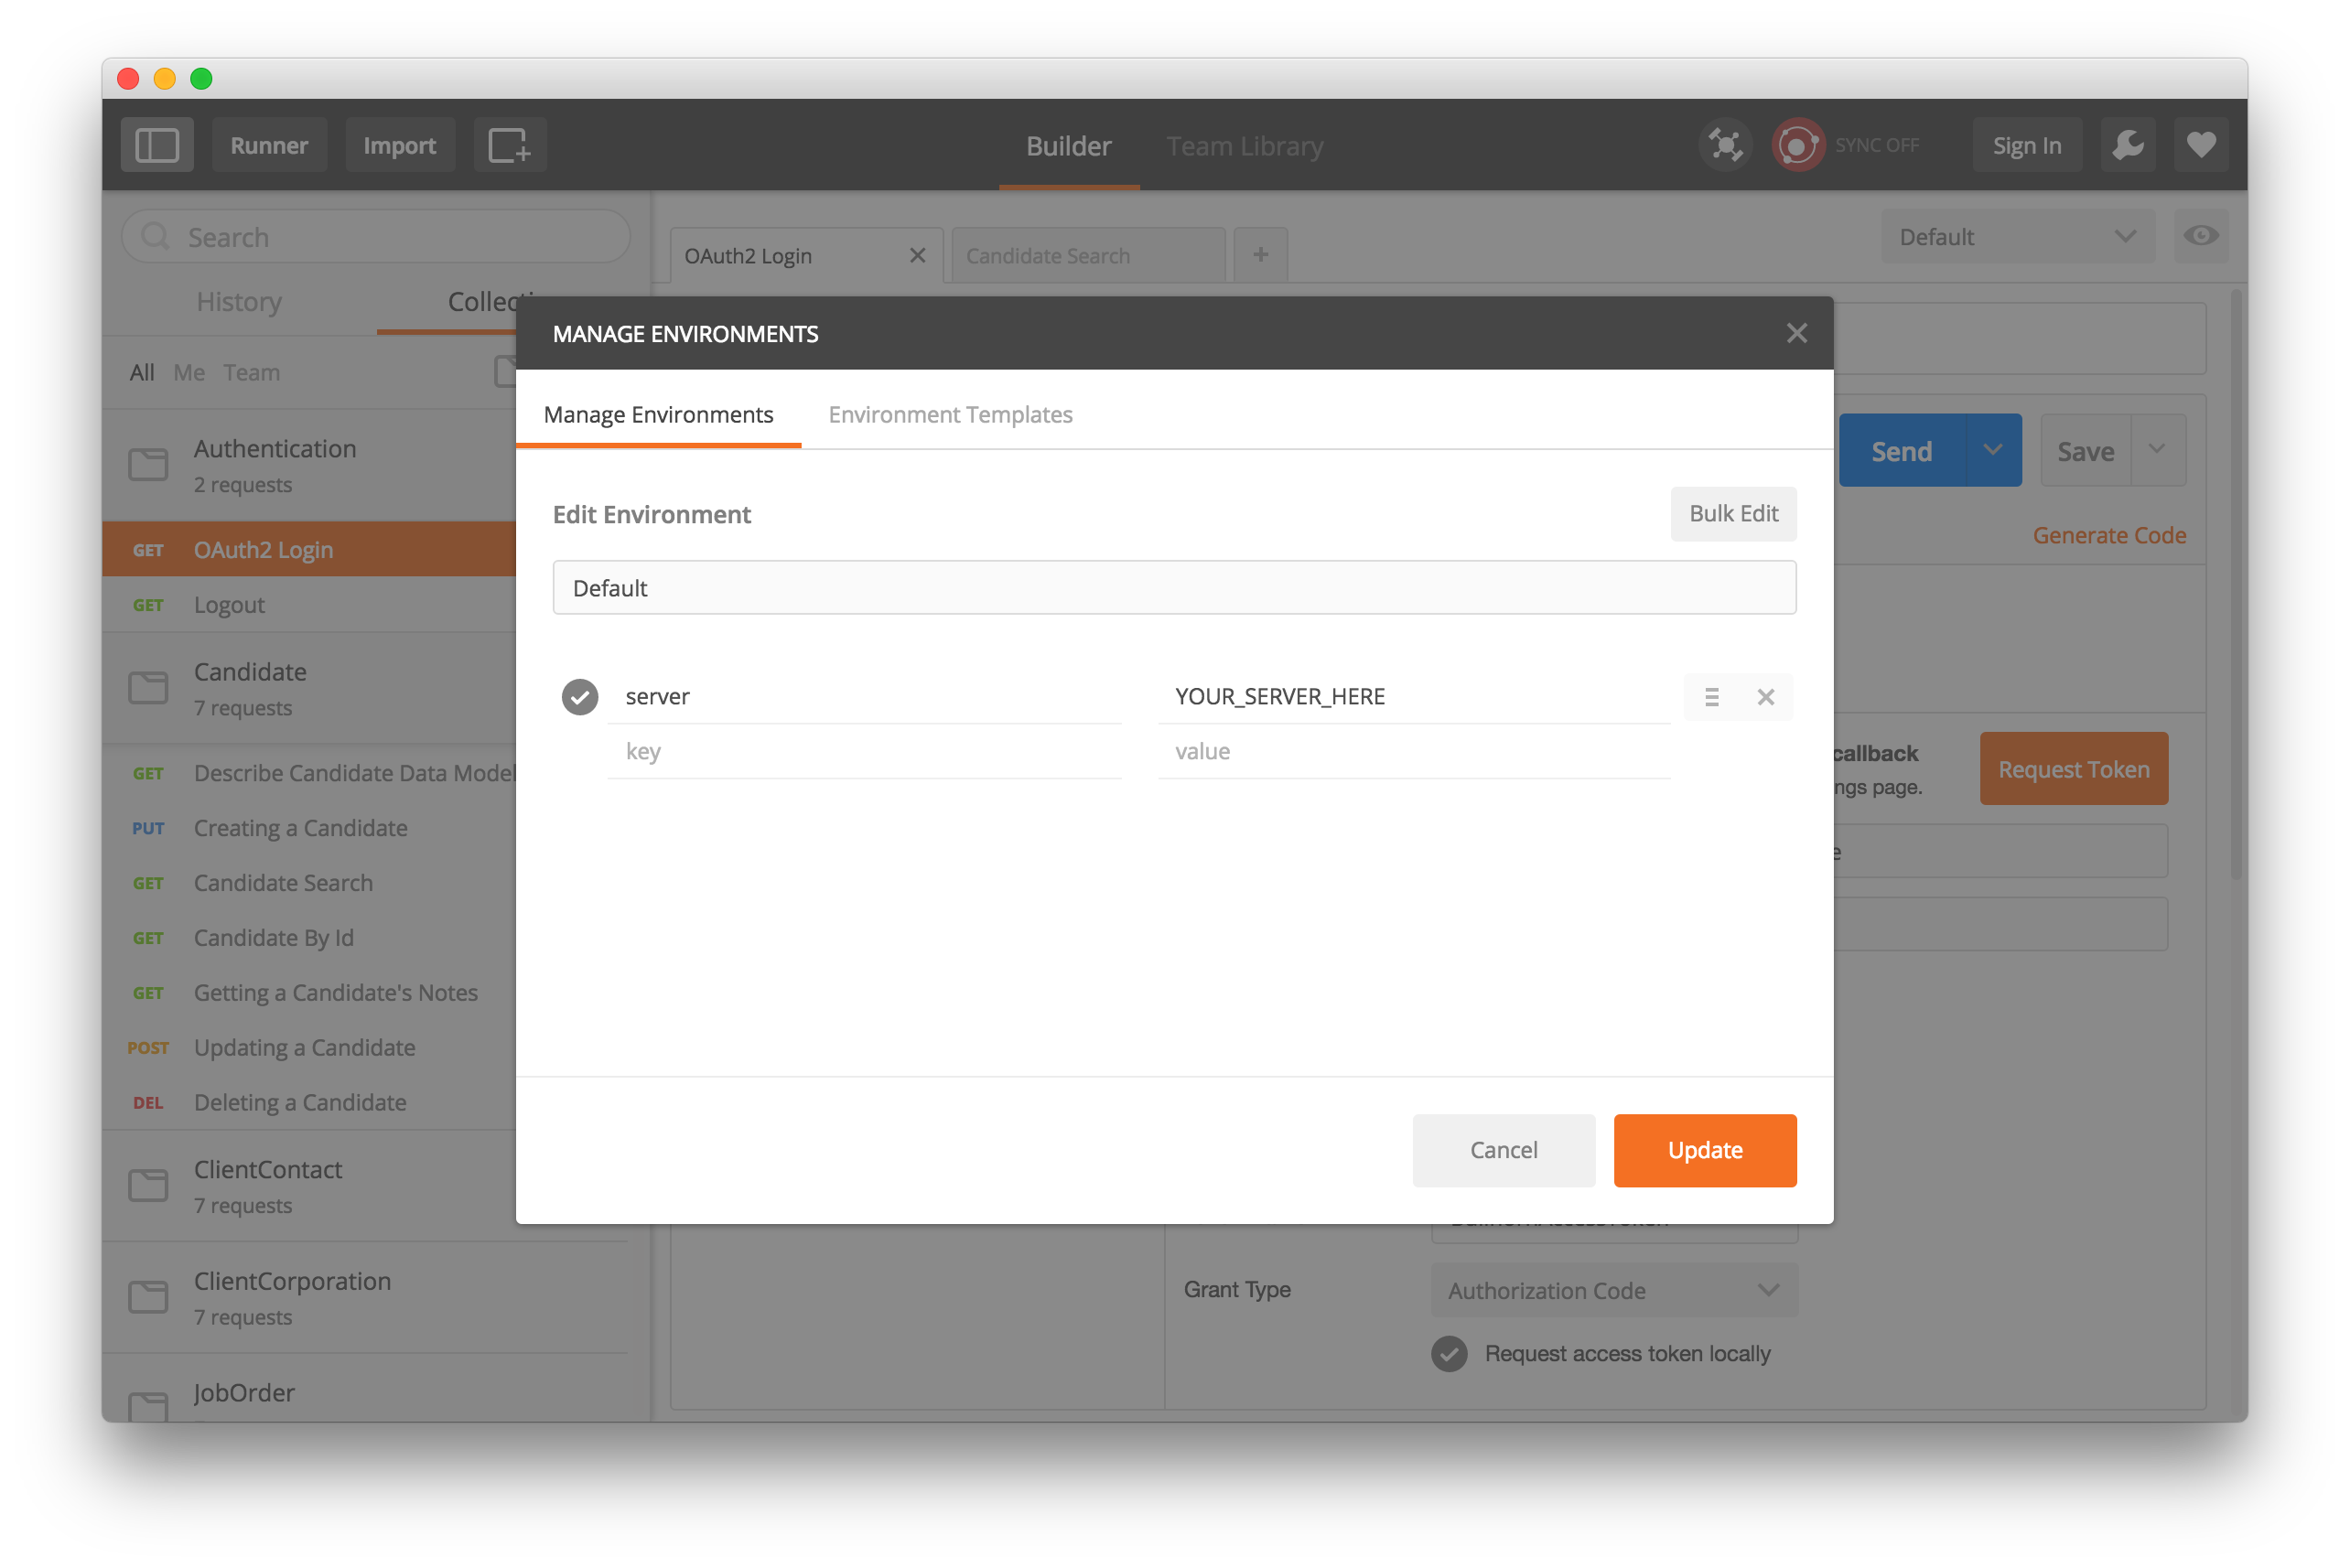
Now we almost ready to get started. The last step is to setup your environment. From the environments drop down in the upper right of the application, select “Manage Environments.” As in the screenshot below, you need to add a “server” environment variable to connect.
- For staging, this will be: rest9.bullhornstaffing.com
- For production, this will be: rest.bullhornstaffing.com

Using OAuth to connect to Bullhorn
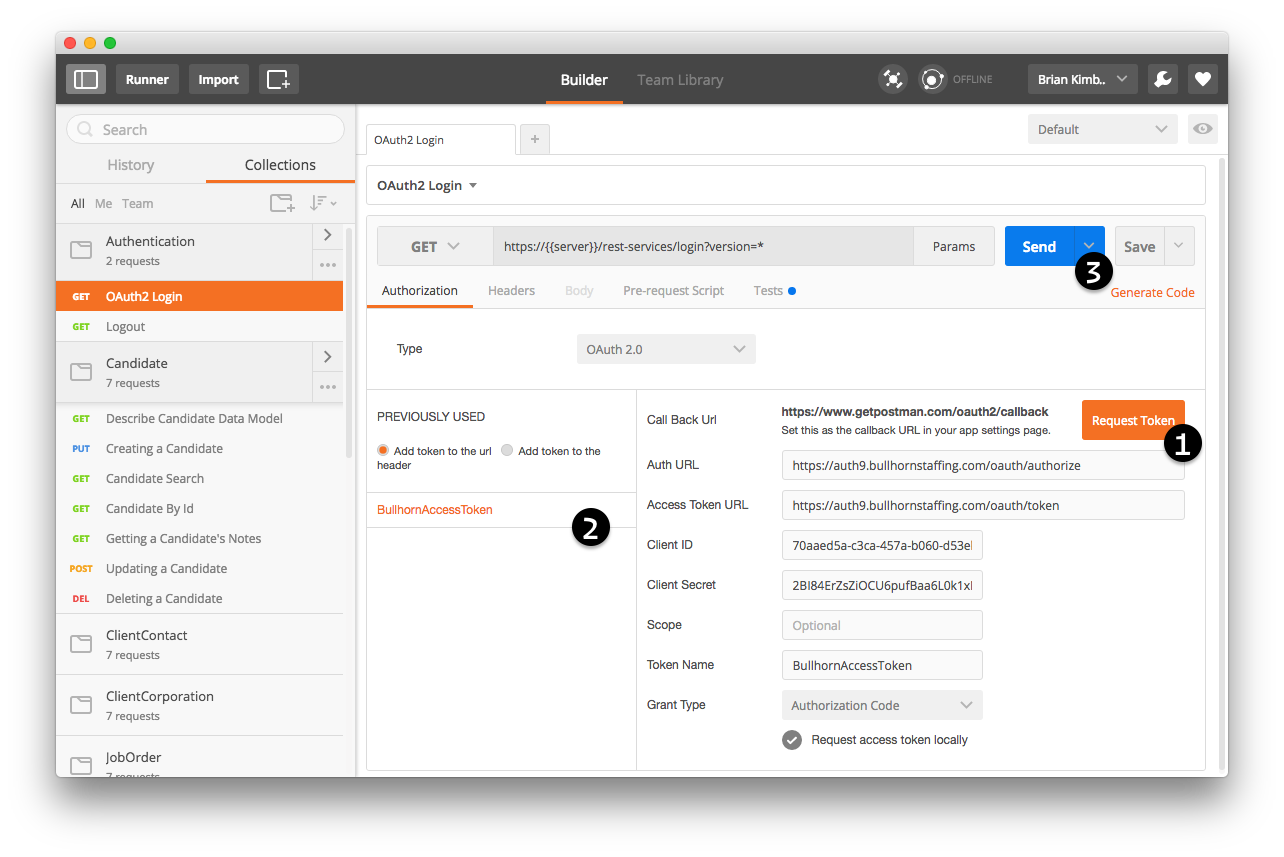
Now you have Postman all setup to connect to the Bullhorn API. From the Authentication section select the OAuth2 Login call. In the Builder view, select “OAuth 2.0” from the type drop down in the Authorization tab. The values should all be pre-populated.
-
Now press request token, this will open a new window for you to enter your OAuth credentials.
-
Once you logged in you will see a BullhornAccessToken available, click on this to add it to the end of the login url.
-
Once the token is added, press Send to login to the REST API.
You will have to repeat these steps every time your token expires. Your ACCESS_TOKEN is only valid for 5 minutes, so it will have to request a new token.

Start making API calls
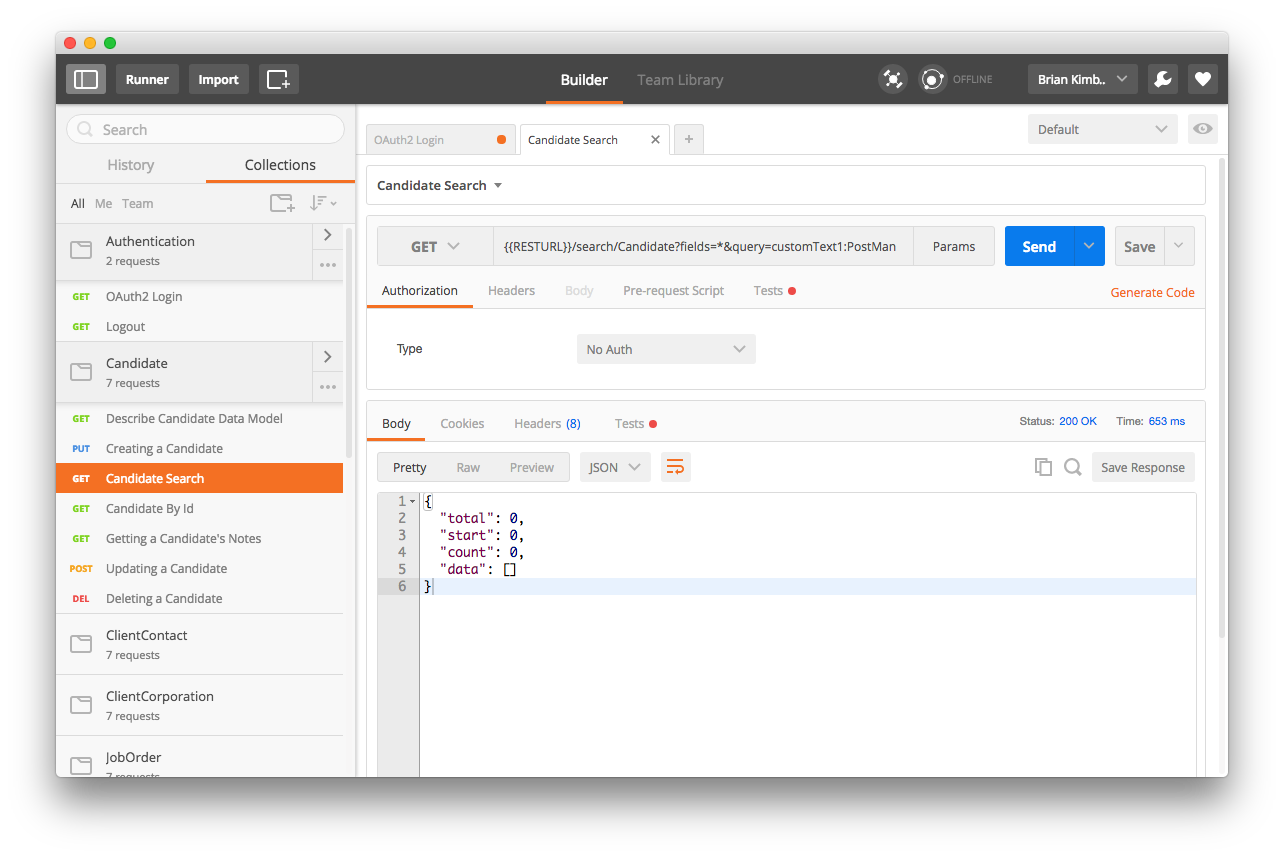
Now you are ready to make api calls. Within each section, some calls need to be run first in order to populate environment variables to make subsequent calls. You can use these variables or replace them with the values you need when exploring your data.

Get access to the Bullhorn REST API
Bullhorn uses OAuth 2.0 as the authorization mechanism for the Bullhorn REST API. See OAuth authorization for the Bullhorn REST API for high-level information about how Bullhorn uses OAuth with the REST API. Bullhorn customers can obtain OAuth keys for developing applications with the Bullhorn REST API by creating a support ticket via the Bullhorn Resource Center.